模型下载与使用
常见的模型下载的平台如huggingface、mindscope,huggingface需要配置代理,这里推荐mindscope
下面的命令是安装mindscope与下载模型到本地的常用命令
pip install modelscope
modelscope download --model Qwen/Qwen3-8B --local_dir xxxx
可以使用下面的代码进行本地调用测试,运行显存占用大约20G:
from modelscope import AutoModelForCausalLM, AutoTokenizer

model_name = "Qwen/Qwen3-8B"
model_path = '/data2/hh/modelzoo/qwen3-8b'

# load the tokenizer and the model
tokenizer = AutoTokenizer.from_pretrained(model_path)
model = AutoModelForCausalLM.from_pretrained(
    model_path,
    torch_dtype="auto",
    device_map="auto"
)

# prepare the model input
prompt = "Give me a short introduction to large language model."
messages = [
    {"role": "user", "content": prompt}
]
text = tokenizer.apply_chat_template(
    messages,
    tokenize=False,
    add_generation_prompt=True,
    enable_thinking=True # Switches between thinking and non-thinking modes. Default is True.
)
model_inputs = tokenizer([text], return_tensors="pt").to(model.device)

# conduct text completion
generated_ids = model.generate(
    **model_inputs,
    max_new_tokens=32768
)
output_ids = generated_ids[0][len(model_inputs.input_ids[0]):].tolist()

# parsing thinking content
try:
    # rindex finding 151668 (</think>)
    index = len(output_ids) - output_ids[::-1].index(151668)
except ValueError:
    index = 0

thinking_content = tokenizer.decode(output_ids[:index], skip_special_tokens=True).strip("\n")
content = tokenizer.decode(output_ids[index:], skip_special_tokens=True).strip("\n")

print("thinking content:", thinking_content)
print("content:", content)
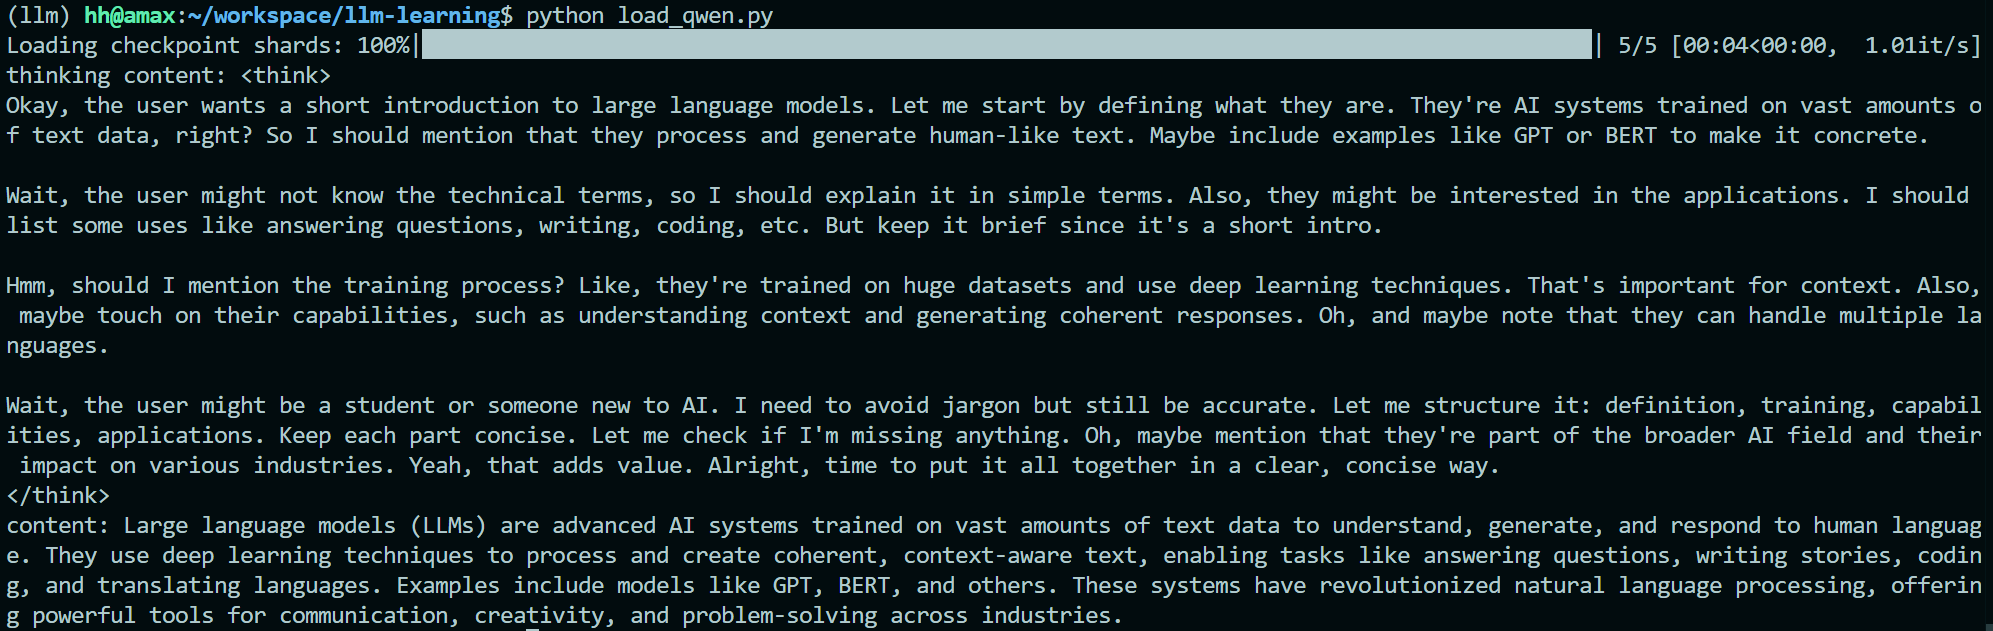
效果如图:
vlm模型使用
以一个pdf转markdown的项目为例:
这个项目在原有的基础上改进使用了Qwen2.5-VL-7B模型,依赖于rapid-layout开源项目。
主要的流程图:
构造了三个prompt:
DEFAULT_PROMPT = """
使用markdown语法,将图片中识别到的文字转换为markdown格式输出。你必须做到:
1. 输出和使用识别到的图片的相同的语言,例如,识别到英语的字段,输出的内容必须是英语。
2. 不要解释和输出无关的文字,直接输出图片中的内容。例如,严禁输出 “以下是我根据图片内容生成的markdown文本:”这样的例子,而是应该直接输出markdown。
3. 内容不要包含在```markdown```中、段落公式使用 $$ $$ 的形式、行内公式使用 $ $ 的形式、忽略掉长直线、忽略掉页码。
再次强调,不要解释和输出无关的文字,直接输出图片中的内容。
"""
DEFAULT_RECT_PROMPT = """图片中用带颜色的矩形框和名称(%s)标注出了一些区域。如果区域是表格或者图片,使用![]()的形式插入到输出内容中,否则直接输出文字内容。"""
DEFAULT_ROLE_PROMPT = """你是一个PDF文档解析器,使用markdown和latex语法输出图片的内容。"""
模型核心调用VLM的代码如下:
model = Qwen2_5_VLForConditionalGeneration.from_pretrained(
    "/data2/hh/modelzoo/qwen2.5-vl-7b", torch_dtype="auto", device_map="auto"
)

min_pixels = 256*28*28
max_pixels = 1280*28*28
processor = AutoProcessor.from_pretrained("/data2/hh/modelzoo/qwen2.5-vl-7b",
                                          min_pixels=min_pixels,
                                          max_pixels=max_pixels)

def _process_page(index: int, image_info: Tuple[str, List[str]]) -> Tuple[int, str]:
    logging.info(f'gpt parse page: {index}')
    # agent = Agent(role=role_prompt, api_key=api_key, base_url=base_url, disable_python_run=True, model=model, **args)
    page_image, rect_images = image_info
    local_prompt = prompt
    local_prompt = role_prompt + local_prompt
    if rect_images:
        local_prompt += rect_prompt + ', '.join(rect_images)
    # content = agent.run([local_prompt, {'image': page_image}], display=verbose)
    messages = [
        {
            "role": "user",
            "content": [
                {"type": "image", "image": page_image,},
                {"type": "text", "text": local_prompt},
            ],
        }
    ]
    text = processor.apply_chat_template(
        messages, tokenize=False, add_generation_prompt=True
    )
    print(text)
    image_inputs, video_inputs = process_vision_info(messages)
    inputs = processor(
        text=[text],
        images=image_inputs,
        videos=video_inputs,
        padding=True,
        return_tensors="pt",
    )
    inputs = inputs.to("cuda")
    # Inference: Generation of the output
    generated_ids = model.generate(**inputs, max_new_tokens=2000, num_beams=1)
    generated_ids_trimmed = [
        out_ids[len(in_ids) :] for in_ids, out_ids in zip(inputs.input_ids, generated_ids)
    ]
    output_text = processor.batch_decode(
        generated_ids_trimmed, skip_special_tokens=True, clean_up_tokenization_spaces=False
    )
    return index, output_text
与原有代码相比更换了较新的模型,同时增加了对检测结果进行nms删除重复检测的图片。详细代码请见